


make up (eye) tutorial
as requested, here's the way *i* do my make-up :)
what you need *listed in chronological order*:
- foundation
- concealer
- eyeliner
- eyebrow pencil
- eye shadow
- mascara
- bronzer
- loose powder/ eye powder
- lip stick + lip gloss
 i use Maybelline's pure. makeup. it is water-base, and has a 50% water formula, so basically your face will be shine free for the rest of the day (i can vouch for that!). it's one of the best liquid foundation i've ever used because of its shine free formula. usually when you use liquid foundation, your face becomes VERY shiny, and you feel like your skin's very heavy, but not with this. the 50% water formula also doesn't clog pores, so you can use this foundation as often as you want to.
apply a layer of foundation, and let it dry for a few seconds.
(photo from www.maybelline.com)
concealer
 i use Red Earth's all round concealer. it has 4 colour corrective cream shades so you can use different shades for different purposes. i usually blend the bottom two shades (yellow and brown) to cover up my pimple scars and the green shade for big fat red pimples. it does quite a good job in covering my pimple scars :)
blend and apply the concealer as needed. then re-apply another layer of foundation.
(photo from www.redearth.com)
eyeliner
 once again, Maybelline's expert eyes defining liner is my personal favourite. it costs around nz$21, which i think is quite reasonable. it doesnt smudge easily, unlike my other eye-liners, and it's crayon like liner makes lining something everyone can do. it has an in-built sharpener, and a smudger at the other end.
i use a grey shade, because i find black too bold for me. grey creates a soft and "just nice" look. use the eyeliner on your upper lid and on your lower lid. make it as thick as you want, or as thin as you want. suit yourself :)
(photo from www.maybelline.com)
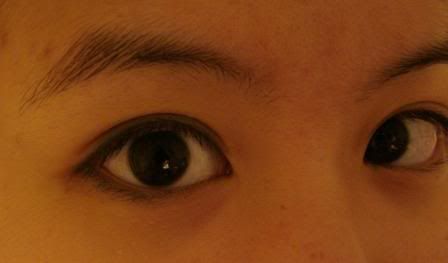
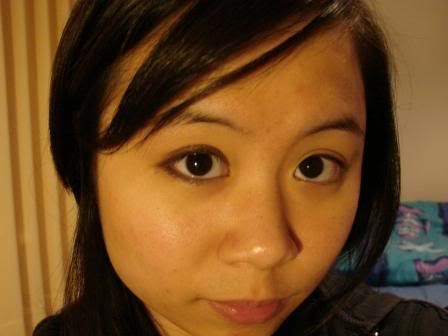
compare my right eye and my left eye. the right eye looks bigger after using the eyeliner while the other eye just looks boring and tired!
eyebrow pencil
this is not a MUST have, but it does pay to have it at times (ie: when you screw up when plucking your eyebrows!).
colour lightly according to the shape of your eyebrows to make them look better :)
eye shadow
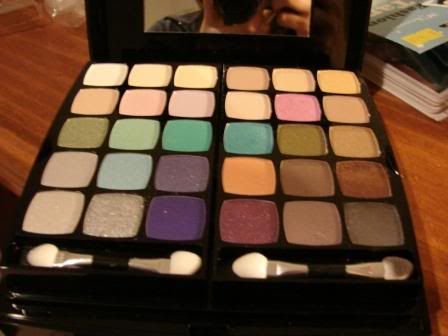
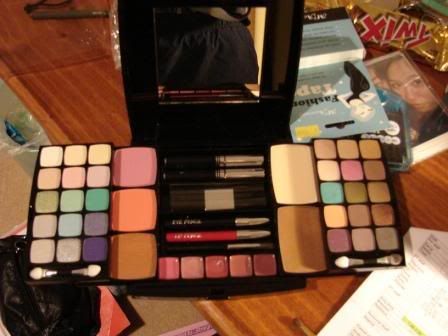
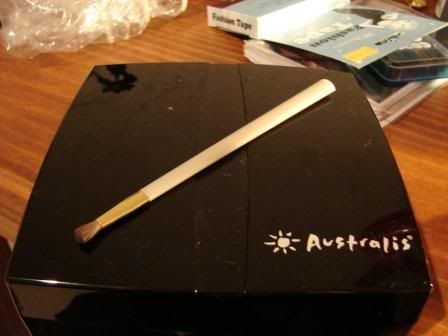
i use the eye-shadows from my Australis kit, purchased for nz$22! it has about 30 shades of eye-shadows, assorted lip stick colours, bronzer, blushes, and pressed powder. it also comes with an assortment of brushes, as well as eyeliner, liquid eyeliner, mascara and a lip liner.
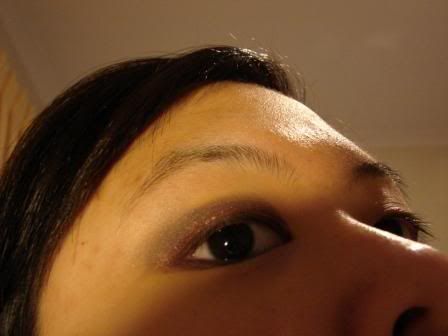
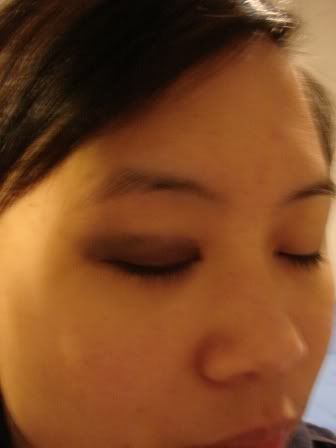
i use the bronze colour, 2nd row up from the bottom on the far right. it gives you the smokey eyes, without making you look like you've been black-eyed. to achieve the smokey eye look:
use a small brush, and make it moist. i usually wet a small piece of facial cotton, and dab the brush on it until the brush is moist. take a little of whatever eye shadow shade you want, and start brushing lightly on your eyes (from the top of your eye-lid fold). use as much as you want, and then move on to the lower lid of your eyes. i usually smudge a little of the eye shadow towards the outer end of my eyes.
once you're done with that, use an eye-shadow applicator and start brushing some eye shadow (very little) from the bottom of your brow(at the end) right down to your eye. if you've applied a wee bit too much, i suggest you to use a finger and rub it off gently.
mascara
 i use Maybelline's XXL Volume and Length mascara. it has 2 sides. the white tip has this magic thing which makes your eye-lashes look super long and the black tip...well, it does what a mascara is meant to do!
apply the first layer using the white tip, and let it dry. then apply using the black tip. i usually apply 1-2 layers.
(photo from www.maybelline.com)
bronzer
i dont like using blusher, because it gives me an artificial looking rosy cheeks, but bronzer does the trick. it gives you a nice "off the beach", glowing look. i use a cheap-o bronzer which i got from Supre, but it does quite a good job. i think i paid about nz$8 for it, or less. use a bigger brush, and apply it from the bottom of your cheeks and then brush the remaining of the bronzer around your face.
loose powder/ pressed powder
i use the pressed powder from my Australis make up kit and brush it around my face and eyes to prevent all the make up from running or smudging.
lip stick & lip gloss

once again, i'm not a fan of lip stick so i usually just go with a lip gloss. Lancome's juicy tube is a good candidate. it's ultra shiny and lasts quite long. and it comes in really yummy flavours! i have the melon flavour, and it is absolutely yummy-licious!
(photo from www.lancome.co.uk)
handy tips:
- use a moist brush to apply eye shadow and this will prevent the eye shadow from falling all over your eye lashes and face. and it'll also help the eye shadow to last longer! mine didn't smudge even though it was on my face for about 10 hours!
- when applying mascara, let the first coat dry before applying the second coat. once the coats are dry and you find lumps on it, use your fingers to remove the lumps.
- i dont like the sticky yucky feeling of lip gloss on my lips, so i'll usually use a lip balm before using a lip gloss. nivea's lip balms are good!
so, how many of you found that useful? i am honestly a total n00b when it comes to make up, so hopefully i didnt sound like a total idiot trying to teach people! HAHAHAHA
![]()

No comments:
Post a Comment